Why a Cooler Strategy Changes Your Trip Budget
Drive-through meals and gas-station snacks are convenient, but the costs compound fast - a family of four can easily spend $60-$100 a day on highway food without a plan. A well-stocked cooler doesn't just save money; it gives your family better-quality food, avoids the energy crashes that come with fast food, and keeps everyone in a better mood on long stretches of highway.
The key insight most families miss is that cooler success isn't just about what you pack - it's about how you pack it. Disorganized coolers get opened constantly, ice melts fast, and food gets abandoned because it's buried or soggy. A strategic approach fixes all of that before you back out of the driveway.
What you will need
Once you have the right gear in hand, the steps below walk you through a proven system that keeps food cold, organized, and actually appetizing throughout a multi-day trip.
Hard-sided cooler with a drain plug
Retains cold temperatures far longer than soft bags and is easier to keep organized.
Block ice or large ice packs
Melts more slowly than cubed ice, keeping food cold and reducing water pooling.
Stackable reusable containers
Let you pre-pack individual meals so the cooler stays organized and nothing gets crushed.
Small soft-sided cooler or insulated bag
Acts as a dedicated drink cooler so the main food cooler is opened far less often.
Permanent marker and masking tape
Label containers by meal or day so the family grabs the right item without digging.
Step-by-Step Cooler Packing System
Follow these steps in order - each builds on the previous one. Skipping the pre-chill step, for example, undermines every subsequent effort to extend ice life.
Build a simple meal plan before you shop
Sit down the evening before you shop and sketch out every meal and snack your group needs for each travel day. Count breakfasts, lunches, dinners, and snacks separately. This prevents over-buying, cuts grocery waste, and means you're only opening the cooler for things you actually planned. A rough plan also reveals which items can be shelf-stable - crackers, nut butters, dried fruit - so they don't take up cooler real estate at all.
Pre-chill the cooler and all food overnight
A room-temperature cooler wastes a significant amount of ice just getting cold. The night before departure, place a bag of ice or frozen ice packs inside with the lid closed. Meanwhile, refrigerate everything that's going into the cooler. Cold food loaded into a pre-chilled cooler can maintain safe temperatures (below 40°F / 4°C) roughly twice as long as food loaded warm.
Layer ice and food strategically
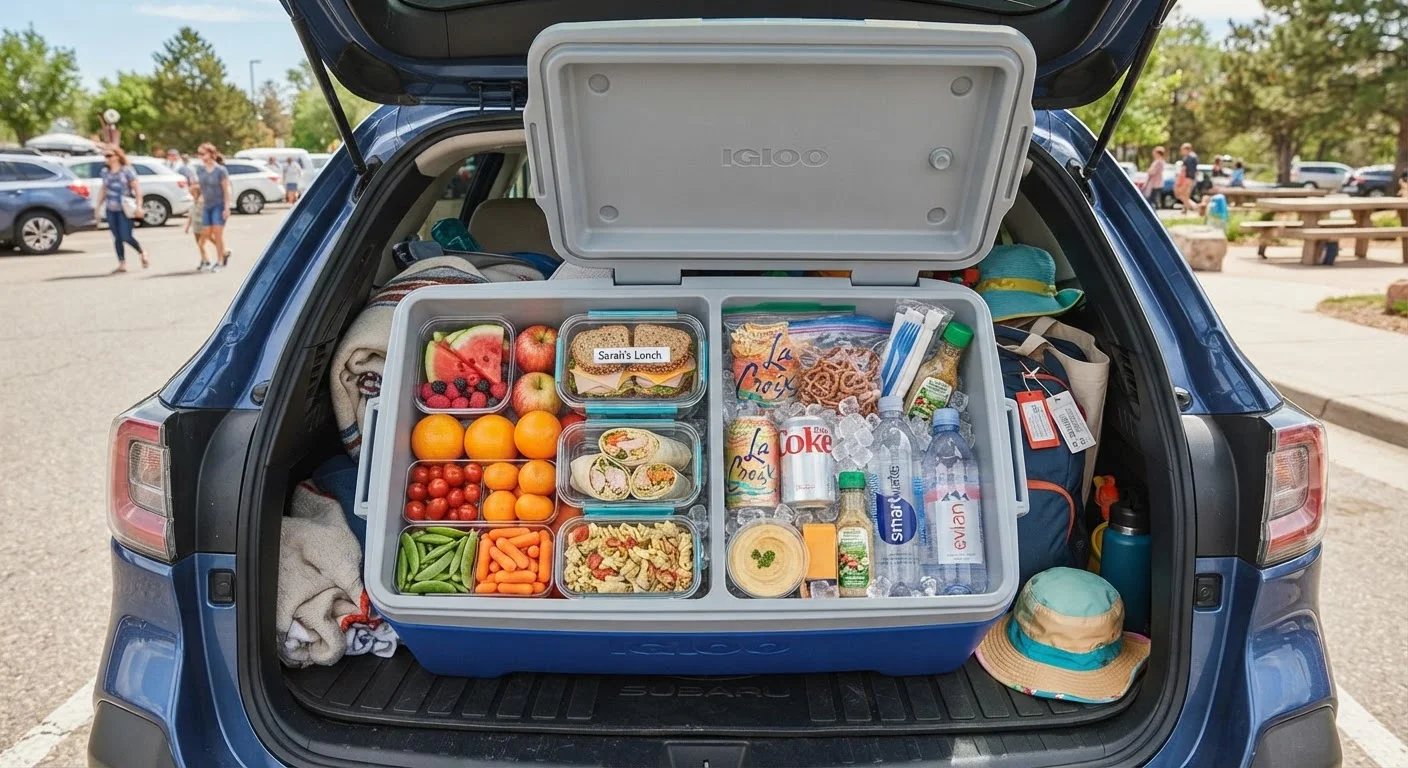
Start with a base layer of block ice or frozen ice packs across the bottom. Place items you'll need last - raw proteins and dinner ingredients - directly on the ice at the bottom. Mid-tier items like cheese, deli meat, and prepped lunches go in the middle. Snacks and breakfast items you'll access first sit on top. Fill gaps with cubed ice. Finish with a final ice layer on top, since cold air sinks and warm air rises.
Separate drinks into a second cooler or insulated bag
Every time someone opens the cooler for a drink, warm air rushes in and melts ice faster. A small secondary cooler or insulated bag dedicated to drinks - water, juice boxes, canned beverages - means your main food cooler stays sealed for hours at a stretch. This single change can extend your ice life by a full day on a long trip, which translates directly to less restocking and less spending.
Pre-portion snacks into grab-and-go servings
Bulk bags of trail mix, grapes, cheese cubes, or veggie sticks are economical at the grocery store but chaotic in the car. Before you leave, divide snacks into individual portions in small bags or containers sized for one person. Label each with the day or meal. This keeps the cooler tidy, prevents overeating, eliminates the need for a gas-station pit stop for snacks, and makes it easy for kids to serve themselves without digging around.
Choose smart food types that travel well
Some foods simply survive road conditions better than others. Hard cheeses outlast soft ones. Whole fruit like apples and oranges travel without bruising. Tortilla wraps hold together better than sliced bread on bumpy roads. Hard-boiled eggs, hummus cups, and cooked pasta salads pack well and reheat easily. Avoid anything with heavy sauces or high moisture content that will turn soggy or leak and contaminate other items.
Drain meltwater regularly and restock ice at grocery stores
Standing water accelerates bacterial growth and makes food soggy. Open the drain plug at every rest stop and let meltwater out. When ice runs low, grocery stores are almost always cheaper per pound than gas stations or highway rest areas for ice. Plan a midway grocery stop intentionally - it's also a chance to restock fresh items, stretch your legs, and avoid the markup at roadside restaurants.
Freeze What You Can Ahead of Time
Soups, chili, burritos, and even pancakes can be made at home, frozen solid, and packed directly into the cooler. They act as additional ice blocks while frozen, then thaw into ready-to-eat meals by lunchtime. This approach is one of the most effective ways to eliminate mid-trip restaurant stops entirely.
After your first trip using this system, you'll likely find yourself refining the meal plan further - knowing which foods your family actually reached for versus what came home untouched. That real-world feedback makes every subsequent trip cheaper and more efficient.
Troubleshooting Common Cooler Problems
Even with good preparation, a few issues come up repeatedly on road trips. Here's how to handle them:
- Ice melts too fast: The cooler is likely being opened too often or was not pre-chilled. Enforce a rule that only one designated person opens the food cooler at rest stops.
- Food smells or tastes off: Drain meltwater more frequently and check that raw proteins were vacuum-sealed or double-bagged before loading.
- No room for a second cooler: Use a large insulated grocery tote for drinks instead - it takes up far less space and still meaningfully reduces how often the main cooler is opened.
- Kids want hot food: Pack a small electric kettle or plug-in car adapter for instant oatmeal, ramen, or hot cocoa at rest stops. Many rest areas also have microwaves available.
Food Safety Is Non-Negotiable on the Road
The USDA recommends keeping perishable foods at or below 40°F at all times. A food thermometer is a worthwhile addition to your cooler kit - it takes the guesswork out of whether items are still safe. Never rely on smell alone to judge whether food has spoiled. When traveling with young children, elderly family members, or anyone with a compromised immune system, err firmly on the side of caution and discard anything questionable.