Choosing the Right Method for Your Hole Size
Not every drywall hole is created equal, and reaching for spackle no matter what is one of the most common mistakes homeowners make. Before you buy anything, assess the damage:
- Nail holes and small dings (under ½ inch): A single application of lightweight spackle, smoothed with a finger or putty knife, is all you need.
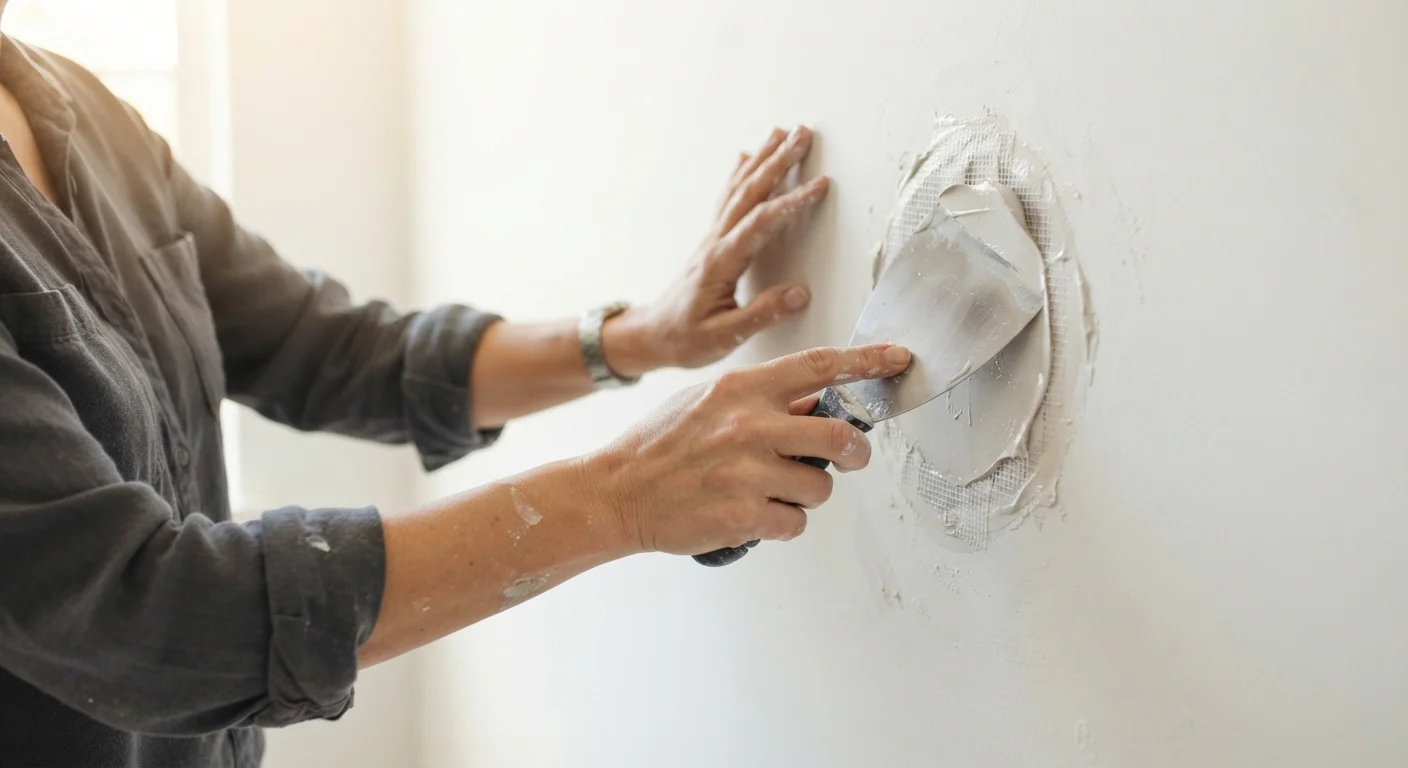
- Medium holes (½ inch to 4 inches): Use a self-adhesive mesh patch - a fiberglass screen that sticks over the hole and gives joint compound something to grip.
- Larger holes (4 inches to about 8 inches): A California patch (also called a "hot patch") uses the drywall's paper face as a built-in tape. Cut a piece of drywall slightly larger than the hole, score the back, snap off the gypsum core, and press the paper border into the compound.
- Holes larger than 8 inches: You'll need to cut back to the nearest studs, install backer boards or a new drywall section, and tape the seams - the same process used in new construction.
Before starting any repair, it's worth reviewing safe working habits for DIY home repairs to set up your workspace properly.
What you will need
Step-by-Step: From Damaged Wall to Finished Surface
Follow these steps in order. Skipping the drying phase between coats is the single most common reason patches crack or show through paint.
Clean and Prepare the Damaged Area
Remove any loose paper, crumbled gypsum, or protruding nails around the hole. For nail pops, tap the nail back in with a hammer and drive a drywall screw 2 inches above and below it to re-secure the panel - then dimple the nail slightly below the surface so compound can cover it flush.
Apply Your Chosen Patch Material
For mesh patches, peel and press the adhesive screen firmly over the hole, centered and flat. For California patches, spread a thin bed of compound around the hole first, then press the paper border into it. For large cut-and-replace repairs, secure new drywall to backer boards with drywall screws, then apply paper tape over every seam using compound as adhesive.
Apply the First Coat of Joint Compound
Using a 6-inch putty knife, spread a thin, even coat of all-purpose joint compound over the patch and 2-3 inches beyond its edges. Feather the edges by reducing pressure as you move outward - the compound should taper to nearly nothing at the perimeter. Remove excess material; thick globs take longer to dry and are harder to sand.
Sand, Then Apply Additional Coats
Allow the first coat to dry completely - typically 24 hours at room temperature, longer in humid conditions. It will turn uniformly white when dry. Lightly sand with 120-grit sandpaper using a sanding block, then wipe away dust. Apply a second coat, widening the feathered edge by another 2-3 inches. Most repairs need two to three coats. The final coat should be very thin - almost a skim coat - focused on filling low spots and smoothing transitions.
Final Sand and Surface Inspection
After the last coat dries, sand with 150-grit paper, then finish with 220-grit for a smooth surface. Hold a work light at a low angle (raking light) to the wall - this harsh side-lighting reveals any ridges, low spots, or tool marks that flat overhead lighting hides. Address any imperfections with a thin skim coat before moving on to texture and paint.
Raking Light Is Your Best Quality Check
Before priming, hold a trouble light or work lamp close to the wall surface and angle it nearly parallel to the wall. This raking light technique reveals ridges, low spots, and tool marks invisible under normal room lighting. Catching imperfections at this stage costs only a few minutes of additional sanding - catching them after painting costs a full repaint.
Texture Matching and Paint: The Final 20% That Makes All the Difference
A smooth patch on a textured wall stands out immediately under raking light. Before painting, replicate the existing wall texture:
- Orange peel or knockdown texture: Thin joint compound to a pancake-batter consistency and apply with a roller or sponge, then lightly flatten peaks with a trowel before it fully sets.
- Skip trowel: Dab irregular blobs of compound with a trowel at varied angles, let them set slightly, then lightly drag the trowel across to partially flatten them.
- Smooth walls: Sand the final coat with 150-grit sandpaper, then 220-grit, and prime before painting.
Always prime the patched area before applying finish paint. Drywall compound is porous and will absorb paint unevenly - called flashing - if it isn't sealed first. One coat of drywall primer is sufficient. When you apply finish paint, feather it several inches beyond the patch to blend the sheen.
If your wall has cracks rather than holes, the repair approach differs. See why that hairline crack in your wall is worth a second look to determine whether the damage is cosmetic or a sign of something deeper before you begin any repair.